
Getting Started with Flodesk Workflows
Making your first workflow can be quite intimidating at first, but it doesn’t have to be. It’s just essential in creating an automatic, streamlined part of your business. It’s there to work for you whenever someone signs up to be a part of your email list. In the video below, I’ll be showing you how to create a workflow in Flodesk. This will help you set it up and forget it as you move forward with your business. Make sure you visit my Flodesk Resource Center for additional help with Flodesk and to find more information.
Elements of a Workflow
Creating a workflow, can start by simply creating a welcome sequence of 6 to 8 emails. First, you create the emails, then you would make a copy of those emails in a workflow you would title “Welcome sequence.” You would put a time delay of one or two days between each email, building a relationship with the person first hopping onto your email list. Remember that a system like that has no time stamp. It is not intended to go out on a specific day and time. It’s there for any time a person wants a freebie or wants to join your email list. No matter what day they join, they will get put into the workflow.
Creating the Emails for the Workflow
One main part of a workflow is creating emails in the “email” section of Flodesk. You make them here, instead of the workflow because you want to have a hard copy to add to other workflows later. You can make emails for a sales sequence workflow, a welcome sequence, a freebie, or a re-engagement. Keep the purpose of the workflow in mind when first creating it. You want the person to take action by the end of the workflow, so you determine the action.
Time Delays
The last thing you want to do is set up a ton of emails, and then have them go out all at the same time to your subscriber. Talk about them running to the unsubscribe button. Ha! Whenever you set one up, you add an email, then push the “+” button to then add a time delay. Add an email, then a time delay and so on. You can choose whether you want thee time delays to have a week in between, days, or hours. It’s totally up to you, based on what type of workflow you are setting up.
Actions
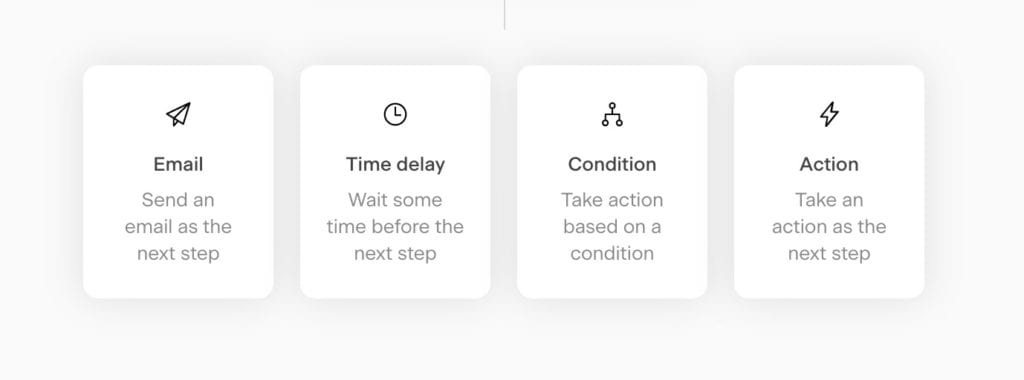
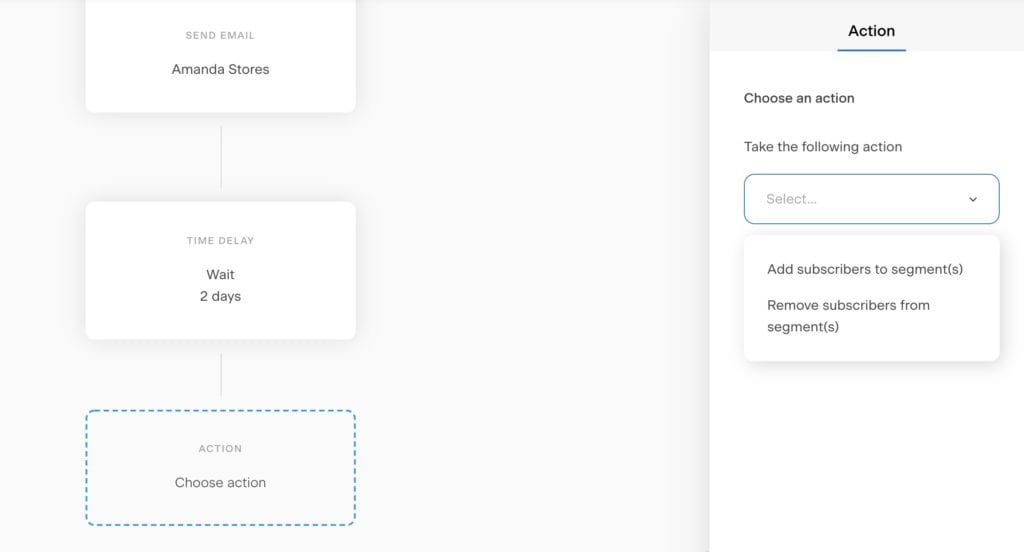
Once you have all your emails underway, you make the choice of either choosing an action, a condition or nothing at the end of the email. If you choose an “action” step, you have two options to choose from. One option would be to add subscribers to a segment or remove subscribers from a segment. For example, I use the action step into my welcome sequence workflow to add subscriber to a “do not disturb” segment. I put that step at the beginning of the welcome sequence workflow, then choose the “remove subscriber from segment” at the end of the workflow. That means, I can exclude that segment while they are in that workflow. It keeps my emails from being bombarding with individual email broadcasts, and the workflow emails.
Conditions
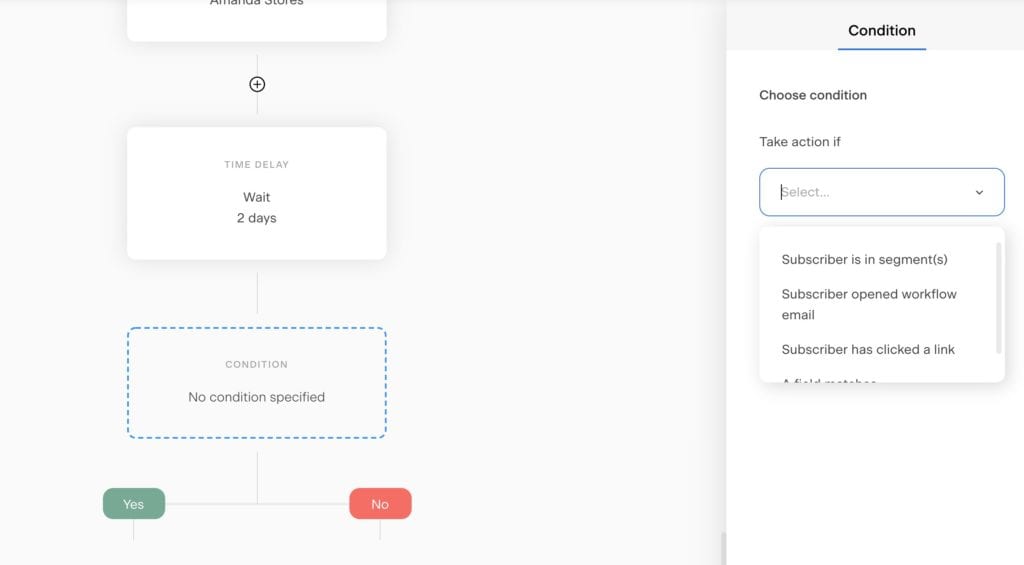
If you set up a condition at the end of your workflow, it’s up to the subscriber to make an action. If they are in a segment, if they open that workflow email, if they click a link within an email or if they match a certain field (ex. name, email…etc.). Click the “yes” for the options again to add an email, time delay, action or another condition. Do not make this hard on yourself. If first beginning workflows, simply choose to add an action of some kind.
Types of Workflows
Sales
Within a sales workflow, you are obviously trying to get them to buy what you are selling. You tell them their pain points, what would happen if they bought your offer and imagine one day if they did. Use your words to speak into your ideal client.
Welcome
There are a few emails that you would include like introducing yourself, telling what you do for others in your business, the story of how you got started and providing free, valuable content. Once that workflow has ended, I send them the same emails I send to everyone else. The key is, choose how long you want to get to know them, create that many emails and set them up on a workflow.
Re-Engagement
This is for the subscribers that have been missing in action for a while. All you would do is create a workflow trying to see if they want to stay on your email list. Remind them of why they entered that space in the first place. Give them a freebie and serve them even then. You would then unsubscribe them from your list. Basically, cleaning up your list.
Freebie
I have used this workflow quite a bit. For every freebie you offer, you are giving them valuable emails after the freebie that directly align with your freebie. For example, when I gave away my Bible journal, I took them through a series of emails that lead to my blogs related to reading the Bible from cover to cover. Give them specific value and content that complements your freebie.
Conclusion
In this tutorial, I’ll show you how I take 5 welcome sequence emails I have created ahead of time, and then show you how I them up in a workflow in Flodesk. Let’t pull it together. Create emails to go in the workflow. Title them “Welcome sequence” with a short description in the email tab. Create a workflow. Make a trigger. Add the emails and make sure to add the time delay in between the emails. If this video ends up being helpful for you, hit the subscribe button to make sure you stay in the loop for future tutorials to help you build a good foundation for your business.
Make sure to visit my Flodesk Resource Center for addition tutorials and information on Flodesk.

Be the first to comment